
Crispy Ramadan Zlabia Made at Home : Zalabia
Ramadan would not feel complete without golden, crispy zlabia, zelabia or zalabia soaked in warm honey syrup.
This homemade version delivers airy layers, gentle fermentation flavour, and reliable results, even when you are away from home.
Crispy Honey Zlabia for Ramadan: Easy Zelabia Recipe and Foolproof Tips
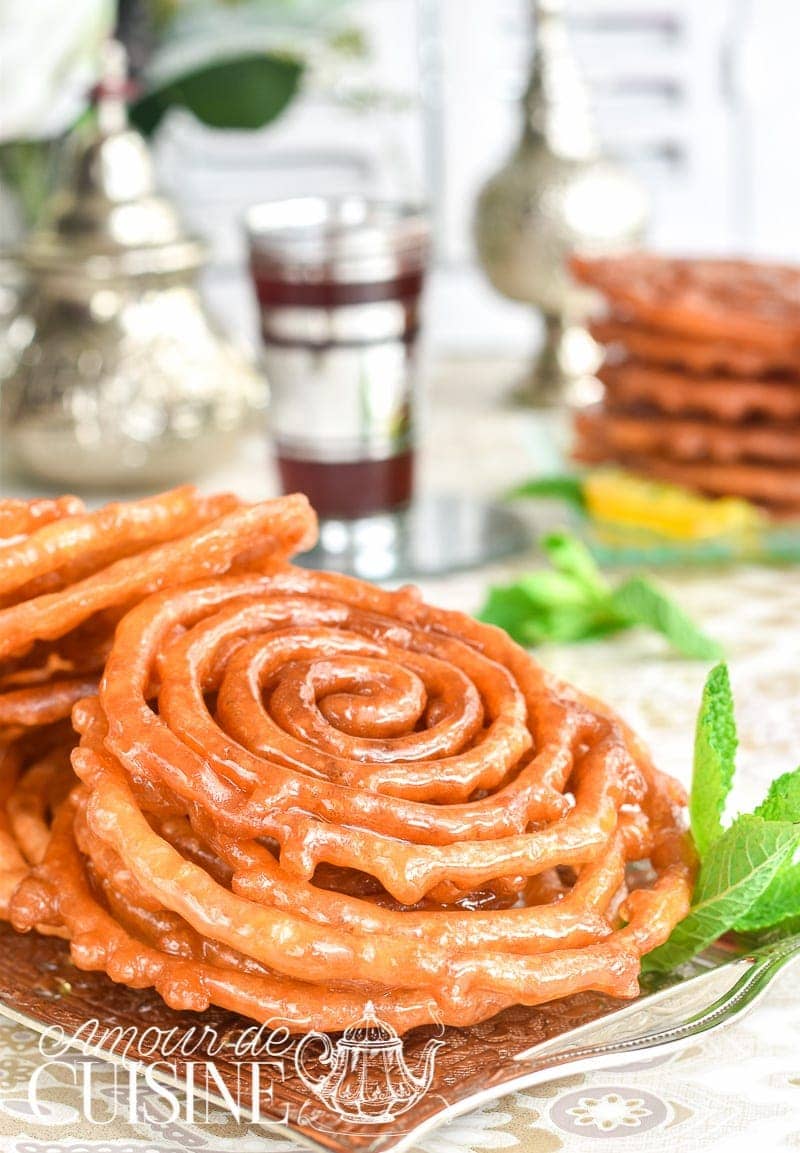
No Ramadan Iftar table feels complete without zlabia: deeply golden, properly crisp, and full of tiny airy bubbles, with that gentle fermented note that makes everyone reach for “just one more.”
Since it’s hard to find zalabia here in England, I make it at home, and this yoghurt-based version truly changed everything.
I tested dozens of recipes from websites and YouTube, but they never gave me that light, lace-like texture, until I tried this recipe.
The yoghurt sounded unusual, so I gave it a go, and the result was a success from the very first batch.
The spirals stay light, the crunch is real, and they soak up warm honey beautifully without turning sticky or heavy.
This is beginner-friendly, as long as you respect the resting time (a few hours of fermentation) and keep the batch size manageable, perfect for family, neighbours, and your own tea-time treat.
Top mistakes to avoid: oil too hot, batter too thick, honey too cold or too hot.

Ingredients for Crispy, Perfectly Soaked Honey Zlabia
Below is everything you need to make authentic homemade zlabia with a light, airy texture and a beautifully crisp finish:
- All-purpose flour (2 cups minus 2 tablespoons, about 230 g). The foundation of the batter, providing structure while staying light after fermentation.
- Cornstarch (2 tablespoons). Helps create a softer, more elastic batter, key for a crisp and airy result.
- Active dry yeast (1 tablespoon). Essential for fermentation and bubble formation, giving zlabia its signature honeycomb texture.
- Granulated sugar (1 tablespoon). Feeds the yeast and adds a gentle sweetness before soaking in honey syrup.
- Plain natural yoghurt (1 tablespoon). The secret ingredient for a tender batter with a subtle tang, reminiscent of traditional zlabia.
- Orange blossom water (1 tablespoon). Adds a delicate floral aroma that enhances the classic Middle Eastern flavour.
- Salt (a pinch). Balances sweetness and sharpens the overall taste.
- Lukewarm water (1½ cups, about 375 ml, adjust as needed). Creates a smooth, pourable batter, neither too thin nor too thick, for perfect spirals.
- Food colouring (red or orange, optional). Gives zlabia its traditional golden hue, inspired by Ramadan pastries.
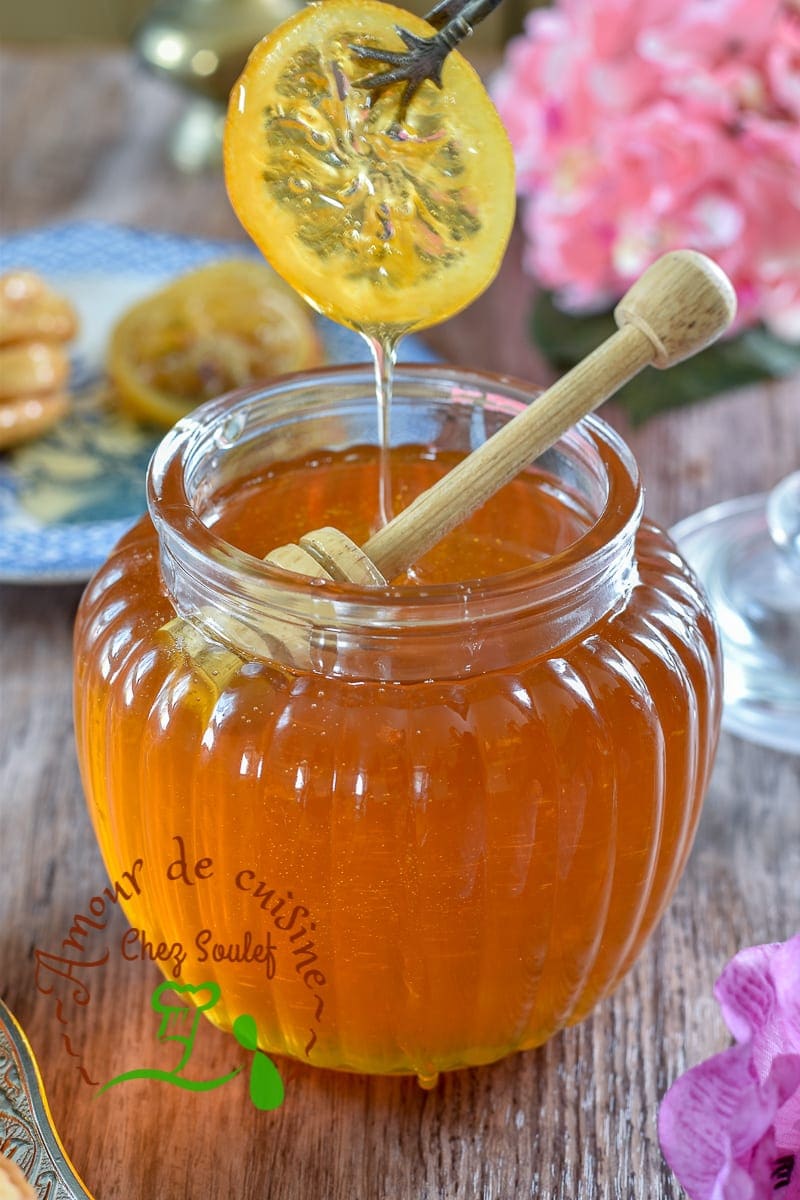
For coating, a homemade syrup works beautifully and is quick to prepare. (recipe coming soon)
Easy Steps for Making Crispy Honey Zalabia
Follow these clear, reliable steps to achieve golden, crispy zlabia that soak up warm honey beautifully.
1. Prepare the Batter
- In a large bowl, combine the flour, cornstarch, yeast, sugar, yoghurt, orange blossom water, and salt.
- Gradually pour in the lukewarm water, stirring continuously to prevent lumps.
- Mix until you get a smooth, pourable batter: slightly thick but flowing.
- Cover with a clean kitchen towel and let rest for at least 1 hour, allowing the yeast to activate and create an airy texture.
2. Heat the Oil
- Heat a frying pan with about 1 cm (½ inch) of oil; a deep fryer is not necessary.
- The oil should be hot but not smoking.
- Transfer the batter to a squeeze bottle with an opening of about 8 mm (a piping bag also works well).
3. Shape the Zlabia
- Hold the bottle vertically over the hot oil.
- Pipe the batter in spirals, starting from the centre and working outward without breaking the flow.
- To secure the shape, draw a thin line across the circle before frying begins.
4. Fry and Soak
- Fry until golden and crisp, then flip to cook the other side evenly.
- Remove from the oil and immediately dip into warm honey, letting it absorb for a few seconds.
- Drain on a rack or plate before serving.
Ramadan Pastry Video: Zlabia (Zelabia)
You can watch the zlabia recipe video here for a closer look at the batter texture and the shaping technique.
Don’t forget to subscribe to my YouTube channel, I’ll be there, and I look forward to hearing your thoughts on my videos.
How to Store Zlabia Properly and Keep Them Crispy
Zlabia is at its best when freshly made, but with the right storage, you can enjoy it longer without losing its crunch. Here’s how to store it correctly:
-At room temperature (1-2 days maximum)
- Place fully cooled zlabia in an airtight container.
- Store in a cool, dry place, away from heat and humidity.
- Avoid the refrigerator, as moisture will soften the crispy texture.
– In the refrigerator (up to 3 days)
- Keep zlabia in a tightly sealed airtight container.
- Reheat briefly in the oven or in a dry pan to restore crispness.
- Do not use the microwave, as it will make them soft and soggy.
– In the freezer (up to 1 month)
- Store zlabia in freezer bags, removing as much air as possible.
- Thaw at room temperature, then reheat in the oven at 150°C (300°F) for about 5 minutes to bring back the crunch.

Tips and Tricks for Foolproof, Crispy Zlabia
Making perfect zlabia takes a little technique and patience. These tips will help you achieve a crispy, airy, honey-soaked result every time:
- Measure ingredients carefully
- Respect the balance between flour, cornstarch, and yeast for a light, flowing batter.
- Keep the sugar minimal, as the sweetness comes mainly from the honey syrup.
- Aim for a smooth, pourable batter
- Add lukewarm water gradually to avoid lumps.
- The batter should be fluid yet thick enough to hold its shape while frying.
- Mix well to activate the yeast and create an airy texture.
- Allow enough fermentation (optional but recommended)
- Rest the batter for at least 1 hour to develop bubbles.
- For deeper flavour and better texture, let it rest 3–4 hours or overnight in the refrigerator.
- Use the right shaping technique
- Pipe the batter using a squeeze bottle or piping bag with an 8 mm opening.
- Form neat spirals from the centre outward, sealing the shape with a thin line.
- Control the oil temperature
- Fry in about 1 cm of oil for even cooking.
- Keep the temperature around 160–170°C to avoid burning.
- Turn halfway through for an even golden colour.
- Soak correctly in honey
- Dip zlabia immediately into warm honey, not hot or cold.
- Drain on a rack to prevent stickiness.
Troubleshooting: Common Zlabia Problems and Fixes
- Soft zlabia / not crispy → Oil not hot enough or batter too thin → Keep the oil steady at 160–170°C and slightly thicken the batter with a little flour.
- Breaks when flipping → Not set enough → Let it form a firm crust before turning.
- Batter spreads, spirals disappear → Batter too runny or over-fermented → Thicken slightly and shorten the resting time.
- Greasy zlabia → Oil too cool → Raise the temperature a little and avoid overcrowding the pan.
- Honey crystallises / zlabia feels sticky → Honey too cold or too hot → Use warm, fluid honey, never boiling.
FAQ: Your Zlabia Questions Answered
- Can I make the batter the night before? → Yes. After fermentation, refrigerate it, then let it sit 30 minutes at room temperature before frying.
- Why does zlabia absorb too much oil? → Oil isn’t hot enough or batter is too soft; stable heat prevents the “sponge” effect.
- How do I get more bubbles? → Respect the fermentation time and avoid overmixing right before frying.
- What’s the best honey or syrup? → Light honey or homemade syrup, gently warmed for balanced soaking.
- Can I bake it or use an air fryer? → Not recommended: zlabia needs partial oil immersion to create its crisp shell and airy honeycomb texture.
Other Desserts to try for Ramadan

Ramadan Zlabia : homemade recipe
- Total Time: 35 minutes
- Yield: 20 zlabia 1x
Description
Ramadan would not feel complete without golden, crispy zlabia, zelabia or zalabia soaked in warm honey syrup. This homemade version delivers airy layers, gentle fermentation flavour, and reliable results, even when you are away from home.
Ingredients
- 2 cups minus 2 tablespoons all-purpose flour (1 cup = 250 ml)
- 2 tablespoons cornstarch
- 1 tablespoon active dry yeast
- 1 tablespoon sugar
- 1 tablespoon plain natural yoghurt
- 1 tablespoon orange blossom water
- 1 pinch salt
- 1½ cups lukewarm water (+/– depending on the flour quality)
- Food colouring to taste (red or orange)
Instructions
- Mix all ingredients and start adding the water in small amounts.
- Once the batter reaches the right consistency, cover it and let it rest for at least 1 hour.
- Preheat a shallow oil bath (about 1 cm deep, no more).
- Pour the batter into a bottle with an opening no larger than 8 mm.
- Hold the bottle vertically over the hot (not burning) pan and pipe spirals from the centre outward, then seal by drawing a line across the diameter of the circle so the spirals hold.
- Fry the zlabia on both sides until nicely coloured and a crust forms on the surface.
- Dip directly into honey and let drain on a plate.
- Store the zlabia in an airtight container in a cool place for 3 days.
- Prep Time: 15 min
- Cook Time: 20 min
Nutrition
- Serving Size: 1 piece
- Calories: 150 kcal