
Hasselback Roasted Butternut Squash
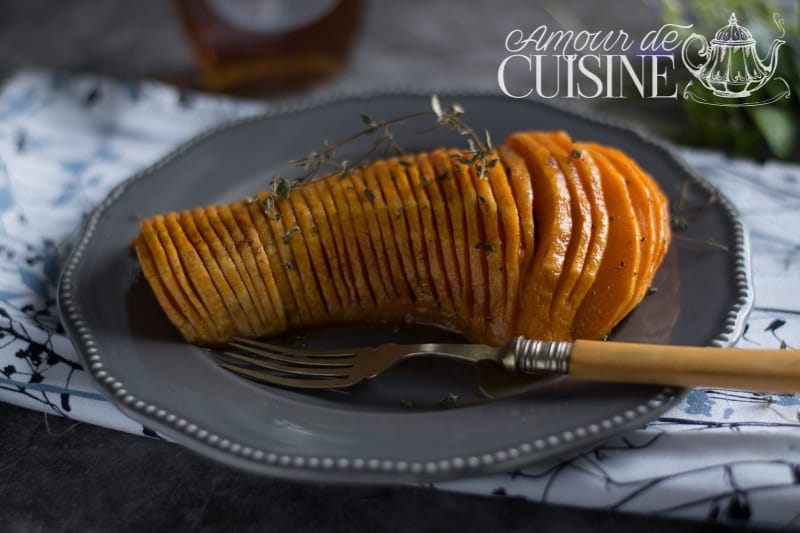
Oven-roasted butternut squash with maple syrup, aromatic spices, and thyme is a flavourful side dish that’s both simple and impressive.
Styled like classic Hasselback potatoes, it makes a stunning centerpiece, so inviting you’ll want to dive in and savour its tender, melt-in-your-mouth texture.

Easy flavourful Hasselback Roasted Butternut Squash recipe
Some recipes have a way of stealing the spotlight without demanding much effort, and Hasselback roasted butternut squash is one of them.
With its golden caramelised edges, tender flesh, and beautiful fan-like presentation, it looks like a showpiece while remaining wonderfully simple to prepare.
The Hasselback technique, slicing the squash thinly without cutting all the way through, creates layers that soak up seasonings and give every bite rich flavour.
This dish is endlessly adaptable. Maple syrup and warm spices bring cozy autumn and winter vibes, while garlic, rosemary, or thyme add rustic charm.
It pairs perfectly with roasted meats, poultry, or holiday mains, but also stands proudly as a vegetarian centerpiece.
Equal parts beautiful and delicious, it’s a recipe you’ll turn to again and again.

Ingredients for Hasselback Roasted Butternut Squash
- 1 medium butternut squash (about 1.5–2 lbs / 800 g–1 kg) – firm, smooth skin, no blemishes.
- 3 tbsp (50 ml) maple syrup – adds a rich sweetness; substitute with honey or agave syrup if preferred.
- A drizzle of extra-virgin olive oil – ensures golden caramelization and keeps the flesh moist.
- 1 tbsp dried thyme – for earthy fragrance; rosemary or sage work beautifully, too.
- 2 tbsp mixed warm spices – cinnamon, nutmeg, ginger, and clove for that holiday feel.
- A pinch of fine salt – to balance the sweetness and enhance flavours.
What Is Butternut Squash?
Butternut squash, also known as winter squash, belongs to the gourd family (cucurbitaceae).
Its elongated shape with a bulb-like base makes it resemble an oversized pear or even a peanut, hence the nickname “peanut squash.”
The skin is thick and pale beige, protecting the vibrant orange flesh inside.
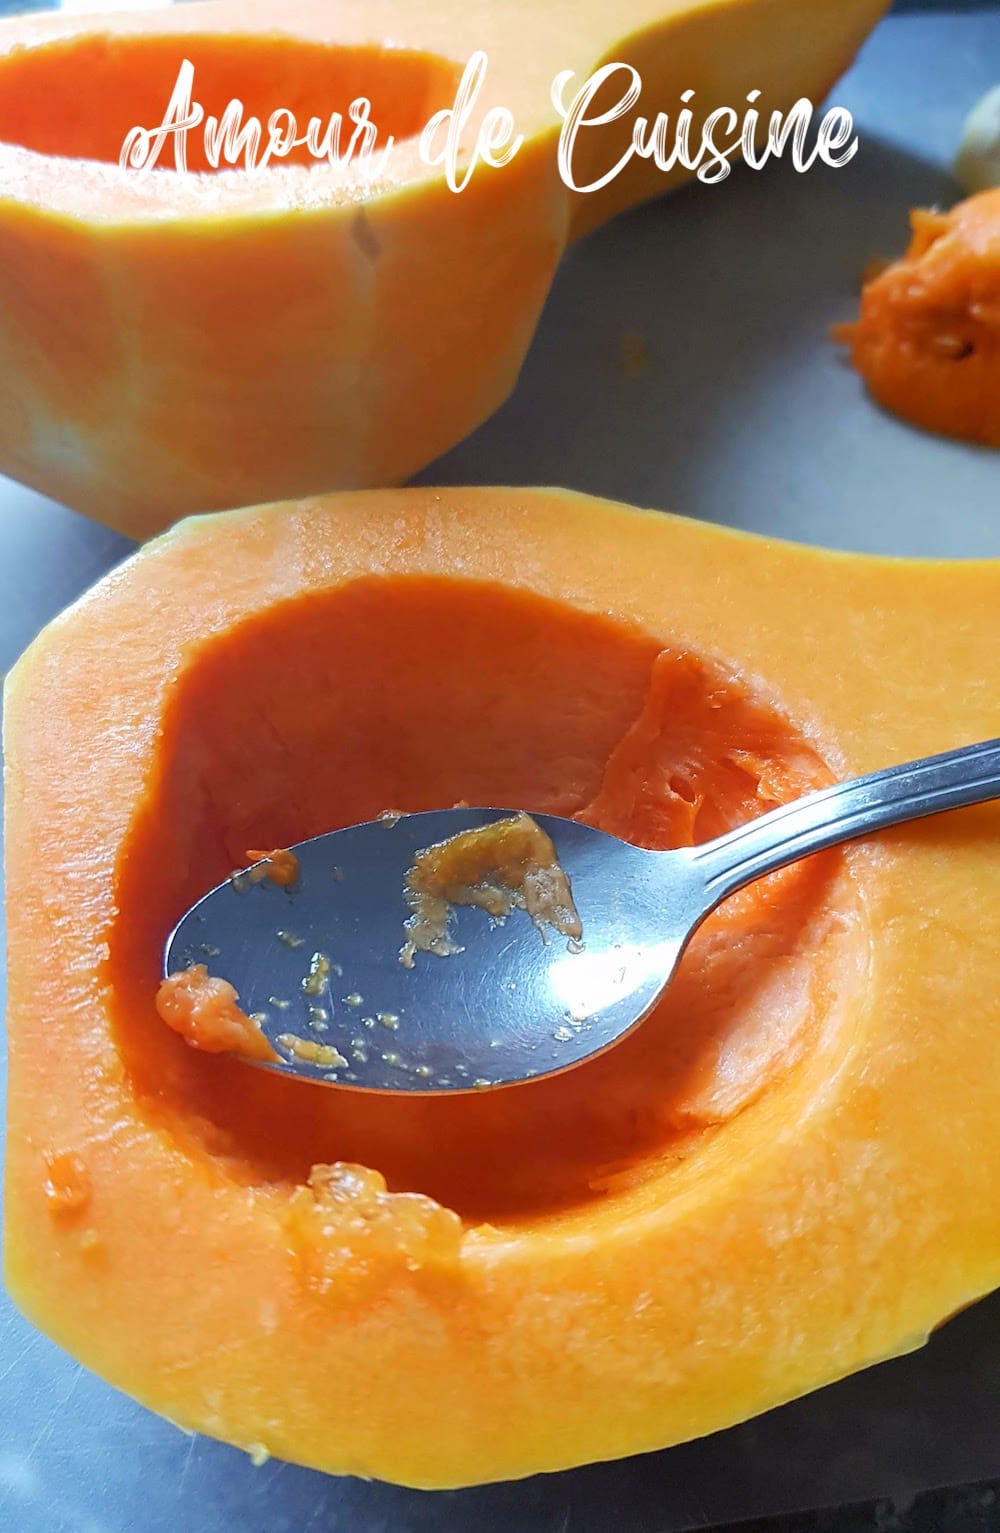
At the base, you’ll find a small hollow filled with seeds, which can either be replanted in the garden or roasted in the oven for a crunchy, flavorful snack.
In the past, this squash was sometimes called “doubeurre,” but today it’s widely recognized by its English name, butternut, which has become popular far beyond English-speaking countries.

Step-by-Step Instructions to Make Hasselback Butternut Squash
1. Cut the squash in half
- This is the trickiest part. Use a sharp, sturdy knife and work slowly, never force it.
- Score the skin first, then follow the marks to split it lengthwise.
- Scoop out the seeds with a spoon (you can roast them later for a crunchy snack).
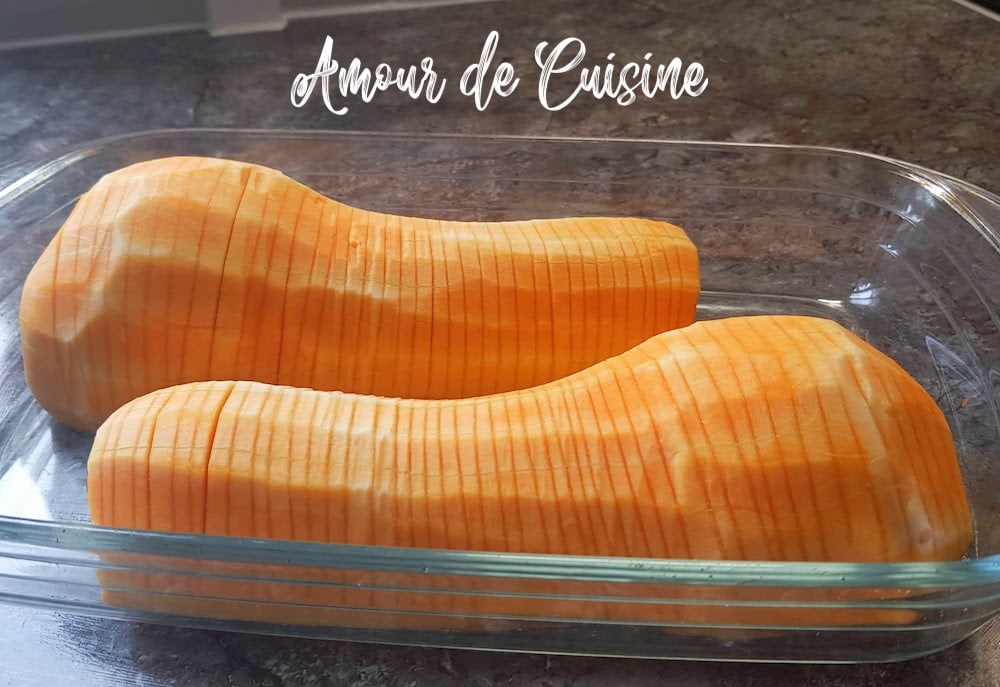
2. Prepare the Hasselback cuts
- Place each half, cut side up, on a chopping board.
- Position two wooden spoons or chopsticks along the sides, then make thin slices across the squash without cutting all the way through.
- The spoons act as a guard, keeping the base intact.
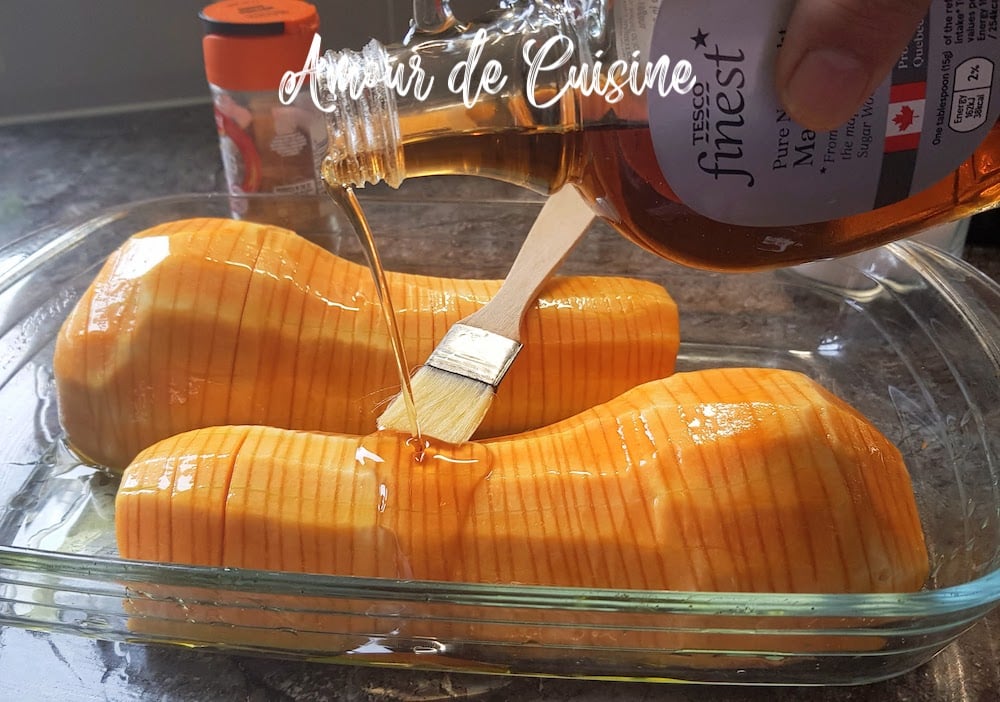
3. Season generously
- Arrange the halves in a baking dish.
- Brush with olive oil and drizzle with maple syrup.
- Sprinkle with salt, thyme, and the spice mix, making sure some flavours seep into the cuts.
4. Roast until tender
- Preheat the oven to 410°F (210°C).
- Roast for about 40 minutes, basting halfway with the cooking juices.
- Cover loosely with foil for the last 10 minutes to achieve perfectly soft flesh without drying out.
Tips & Tricks for Perfect Hasselback Squash
- Pick the right size: medium squash (1.5–2 lbs) cooks evenly and looks great on the table.
- Adjust cooking time: smaller squash may be ready in 30 minutes, larger ones in 50–55.
- Avoid breakage: use the wooden spoon trick to keep slices neat and intact.
- Play with flavors: try rosemary, sage, cumin, chili flakes, or even garlic butter.
- Swap maple syrup: honey, agave, or molasses add their own character.
- Reheat & store: keeps up to 3 days in the fridge; reheat at 350°F (180°C) for 10 minutes.
Variations & Serving Ideas
- Savory version: garlic, rosemary, and thyme for a rustic side.
- Sweet version: maple syrup, cinnamon, and chopped walnuts for a festive touch.
- Stuffed Hasselback: slip cheese, finely chopped veggies, or fresh herbs between slices.
- Vegan delight: skip honey or dairy, stick to olive oil, spices, and herbs.
- In other dishes: add leftovers to creamy soups, gratins, or warm grain salads.
FAQ – Your Questions Answered
– Do I need to peel the squash? Not necessarily. The skin softens in the oven and is edible. Peel it if you prefer a smoother bite.
– Why isn’t my squash soft? It may be too large or undercooked. Extend baking time by 10–15 minutes and keep it loosely covered with foil.
– Can I freeze cooked Hasselback squash? Yes! Cool completely, wrap well, and freeze for up to 3 months. Reheat in the oven for best texture.
– Can I make this in an air fryer? Yes, if your squash is small enough. Cook for 25–30 minutes at 375°F (190°C).
– Can I use other squash varieties? Absolutely. Potimarron (red kuri) cooks faster and doesn’t need peeling. Pumpkin takes a little longer and can be more fibrous, so choose smaller ones for best results.
Other side-dishes to try

Hasselback Roasted Butternut Squash Recipe (Easy & Delicious)
- Total Time: 1 hour
- Yield: 2 servings 1x
Description
Oven-roasted butternut squash prepared Hasselback-style, flavored with Christmas spices and maple syrup.
Ingredients
- 1 butternut squash
- 3 tbsp (50 ml) maple syrup
- A drizzle of olive oil
- 1 tbsp dried thyme
- 2 tbsp mixed spices
- Salt
Instructions
-
Peel the butternut squash, wash it, and cut it in half lengthwise.
-
Remove the seeds with a spoon.
-
Place the two halves on a cutting board, cut side up.
-
Slice thin, even cuts along each half, without cutting all the way through, so the squash stays in one piece.
-
Place both halves in a baking dish and brush with olive oil and maple syrup.
-
Sprinkle with salt and the spice mix on top.
-
Preheat your oven to 410°F (210°C).
-
Roast for about 40 minutes, keeping an eye on the cooking. Then cover with a sheet of aluminum foil for the final 10 minutes to ensure tenderness.
- Prep Time: 10 min
- Cook Time: 50 min
- Category: Side Dish
Nutrition
- Serving Size: 1 serving
- Calories: 200 kcal