
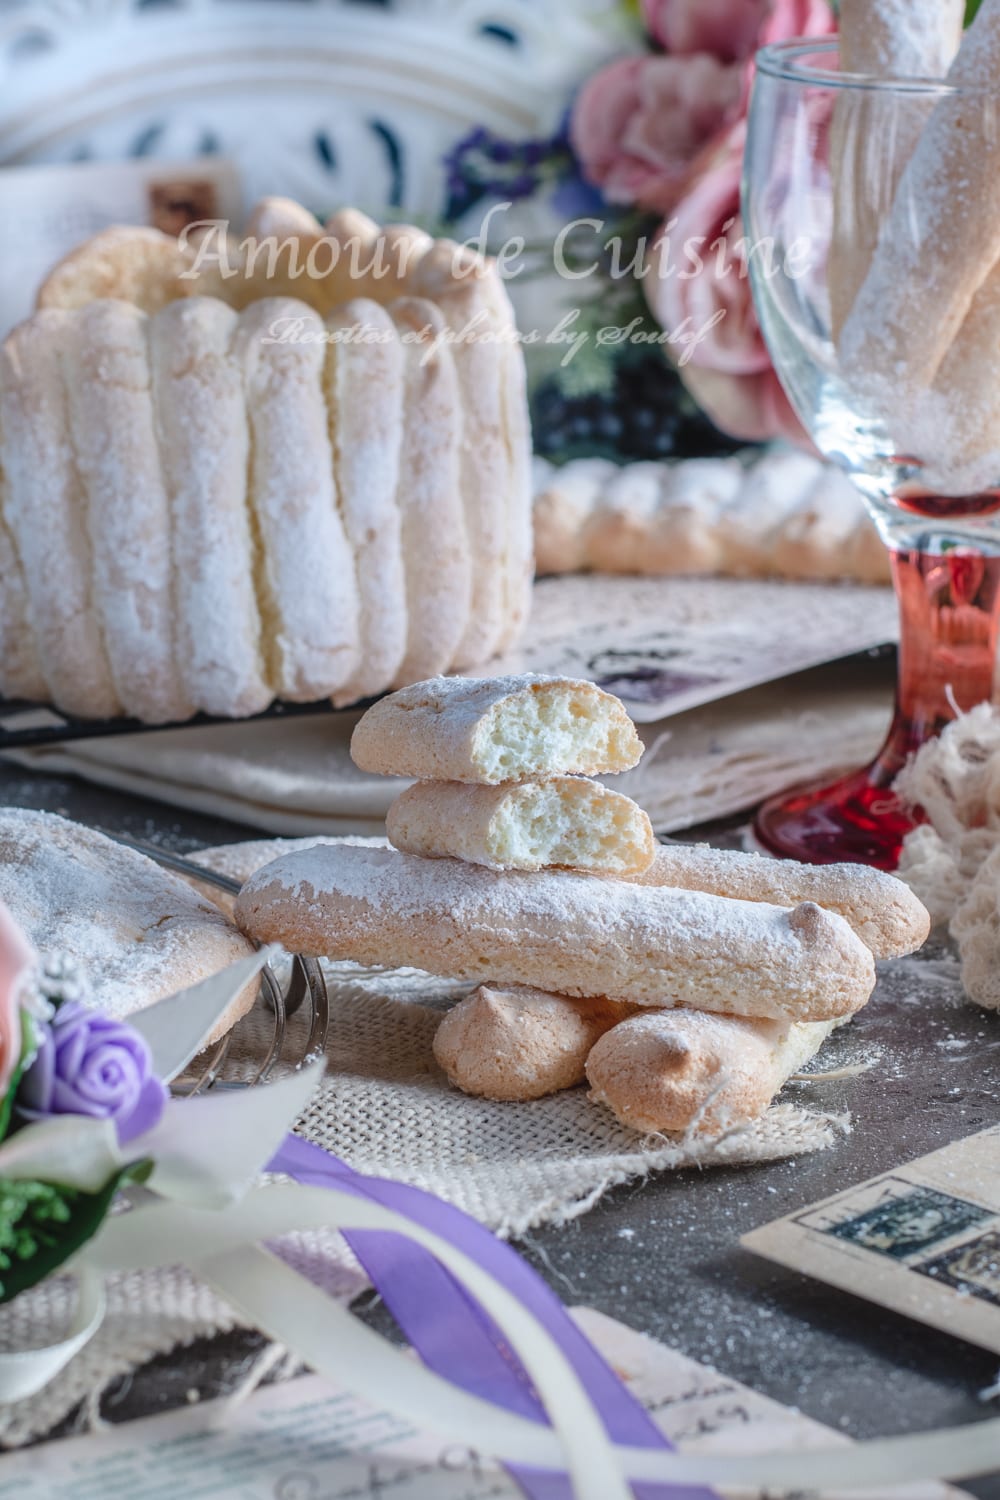
Homemade Ladyfingers (Boudoirs): Easy Recipe
Soft, light, and easy to make, these homemade ladyfingers are a game changer for charlottes and tiramisus.
With this simple recipe, foolproof tips, and just-right quantities, you’ll create desserts like a pastry chef.
Easy Homemade Ladyfingers Recipe (Soft Boudoirs for Tiramisu & Charlotte)
Here’s my go-to ladyfingers recipe, simple to make and always a success.
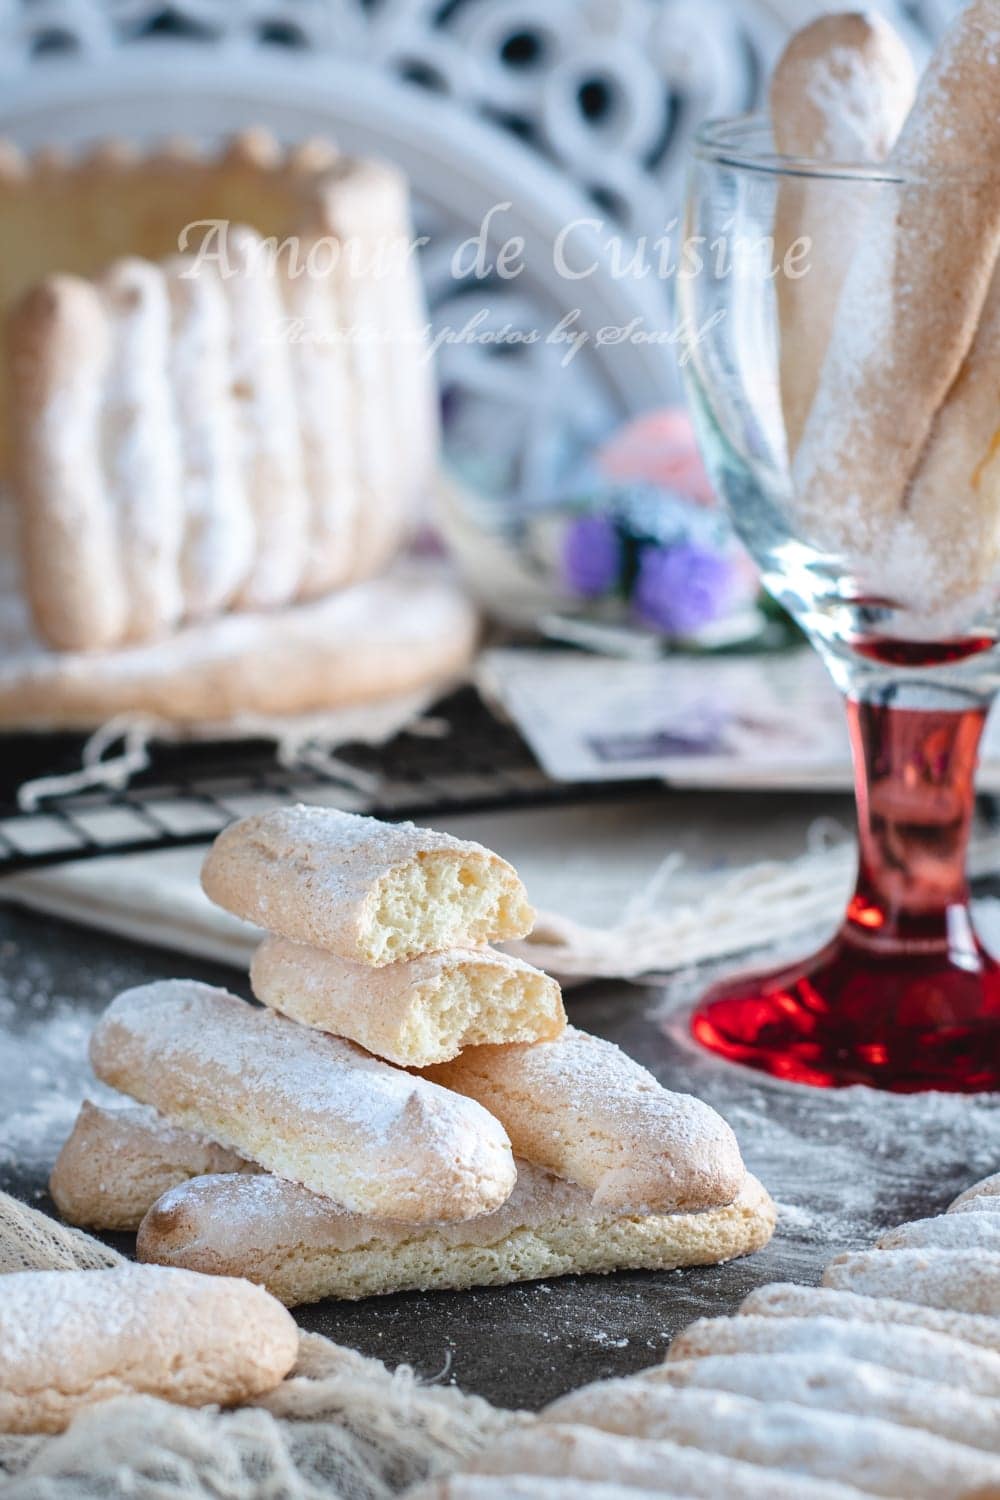
Sure, you can buy ladyfingers at any store, but nothing compares to the homemade version: the texture is lighter, the subtle vanilla aroma shines through, and they simply melt in your mouth!
I don’t save them just for special occasions, whenever I’m craving tiramisu or a charlotte, I prepare a batch in advance.
These homemade boudoirs soak up fruit or coffee flavors perfectly without ever becoming soggy or heavy.
It’s a true pastry chef’s trick for elevating your homemade desserts!
Bonus tip: they keep well for several days in an airtight container, and you can even freeze them, so you always have some ready for last-minute desserts.
Give them a try and you’ll taste the difference!
Ingredients for Homemade Ladyfingers (for a 22 cm Charlotte)
- Fresh eggs (4-5, about 160g whites + 90g yolks)
Separate whites and yolks carefully. Room temperature eggs whip up higher, giving the biscuits their signature airy texture. - Granulated sugar (120g)
Stabilizes the meringue and brings that delicate, melt-in-the-mouth sweetness. - All-purpose flour (120g, or type 45/55 if you have it)
Sifted before adding for a lump-free, light batter. - Pinch of salt
Enhances the flavor and helps the whites reach stiff peaks. - Powdered sugar (for dusting)
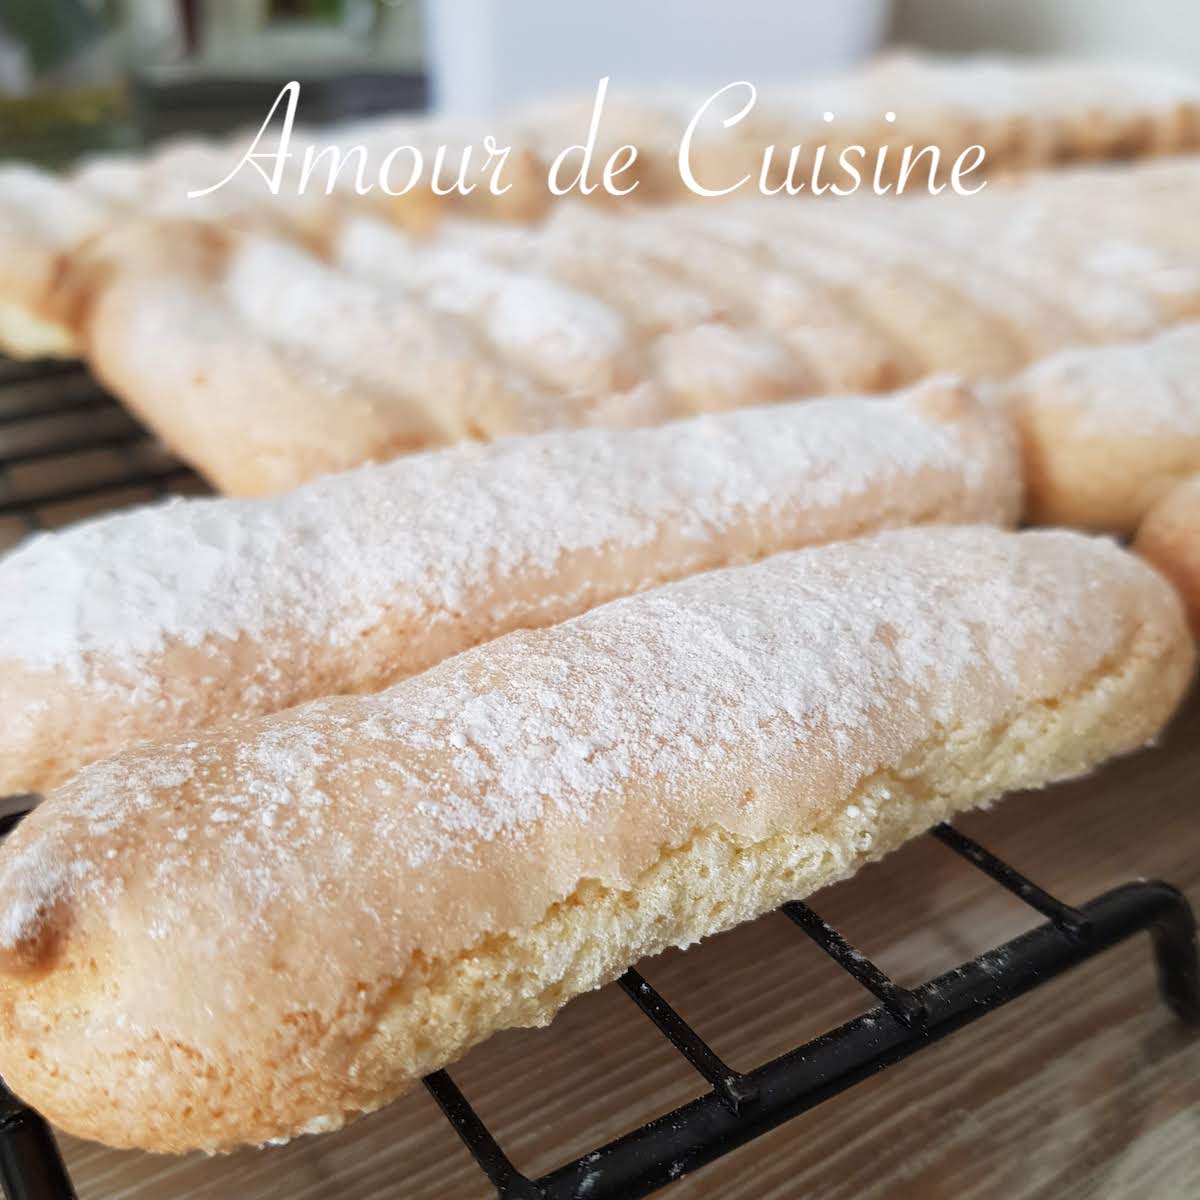
A generous dusting before baking gives ladyfingers their classic crisp white crust.
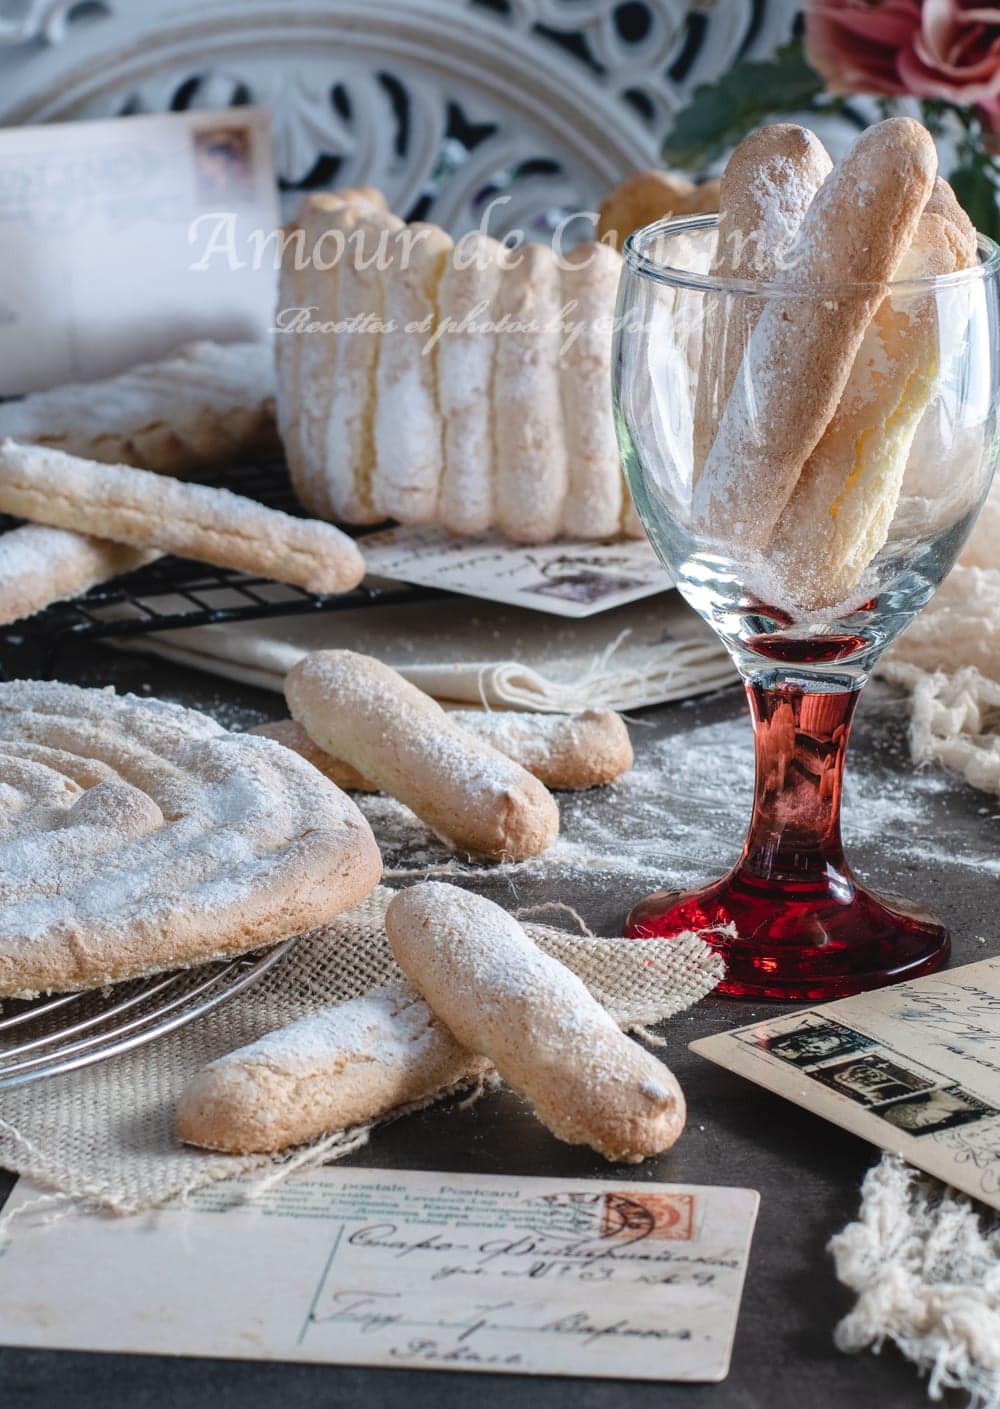
These quantities will give you two 20cm discs, two strips of 8×32cm for lining a charlotte, and several extra ladyfingers.
Step-by-Step Instructions for Perfect Ladyfingers
- Preheat the oven, Set to 180°C (350°F), fan-assisted, for even baking.
- Whip the egg whites, In a clean bowl, beat the egg whites until frothy, then gradually add the granulated sugar. Continue whipping until you have glossy, soft peaks (the “bird’s beak” stage).
- Loosen the yolks, Briefly whisk the egg yolks with a fork, just enough to liquefy.
- Gently fold in the yolks, Using a spatula, carefully incorporate the yolks into the whites, keeping as much air as possible.
- Fold in the sifted flour, Sift flour over the mixture and gently fold it in with a spatula, working from bottom to top until smooth and airy.
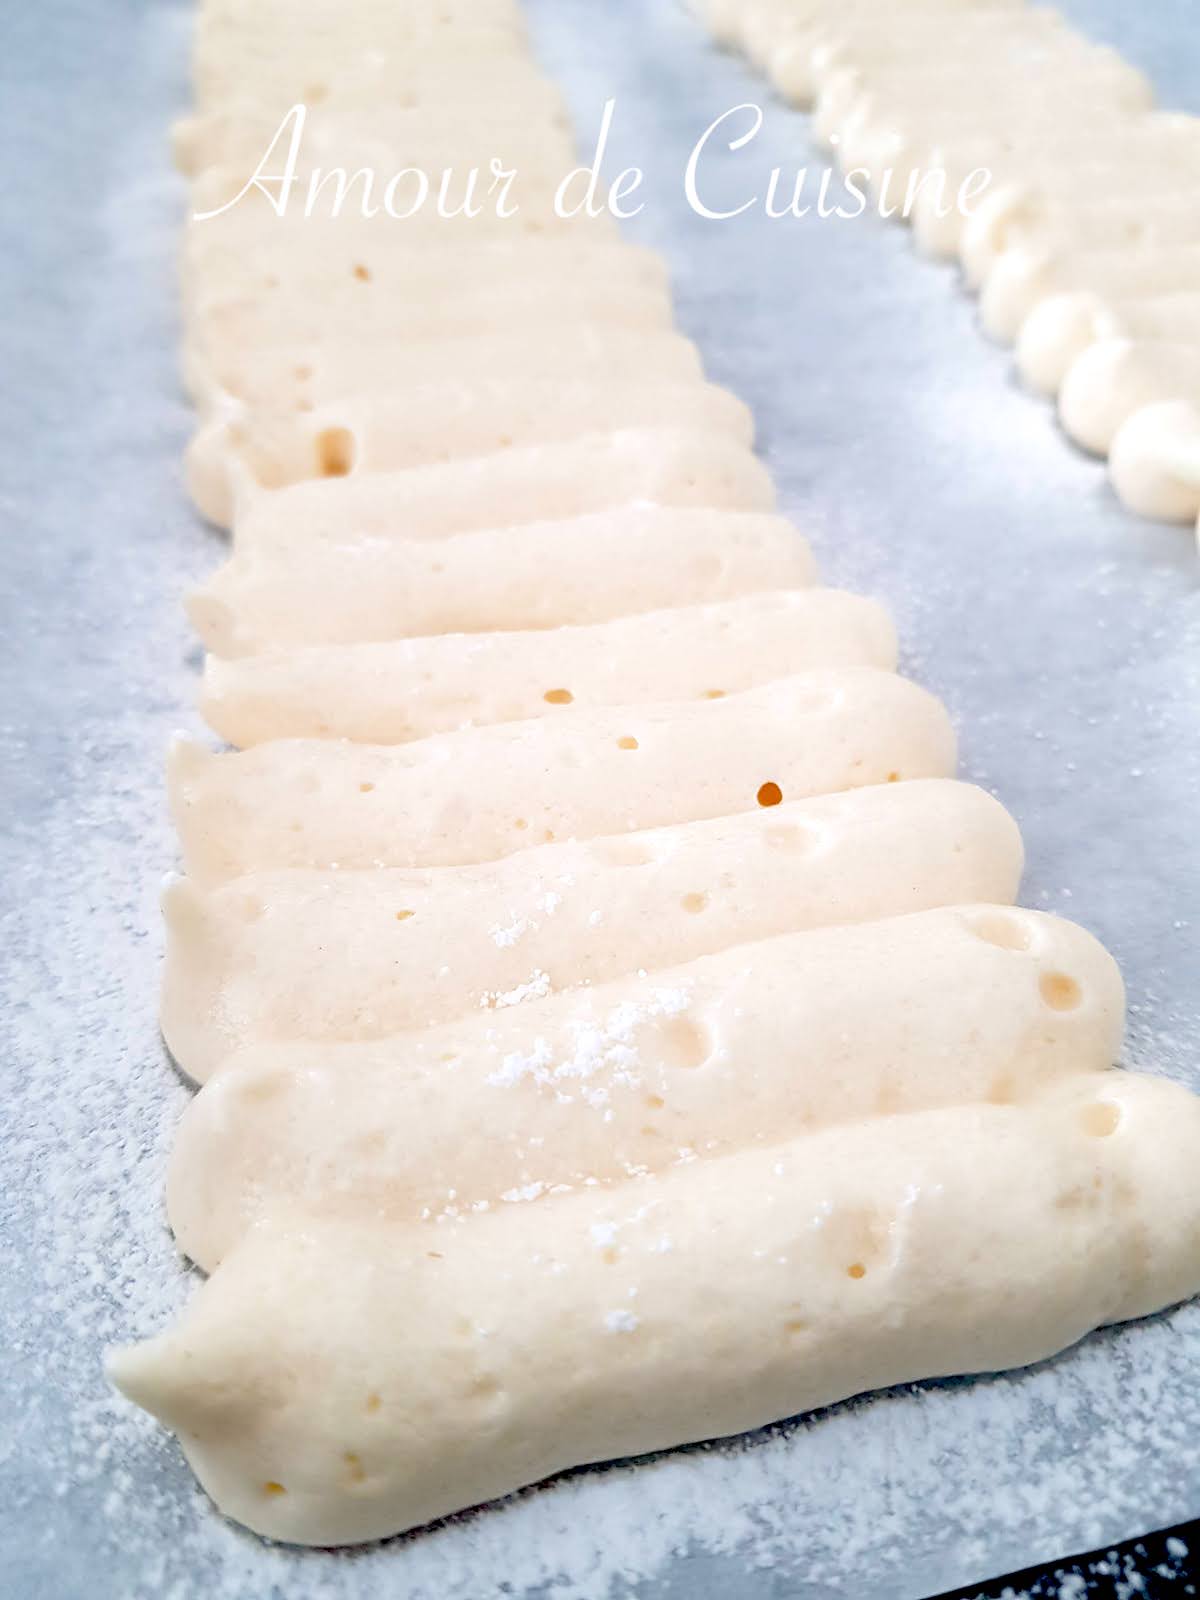
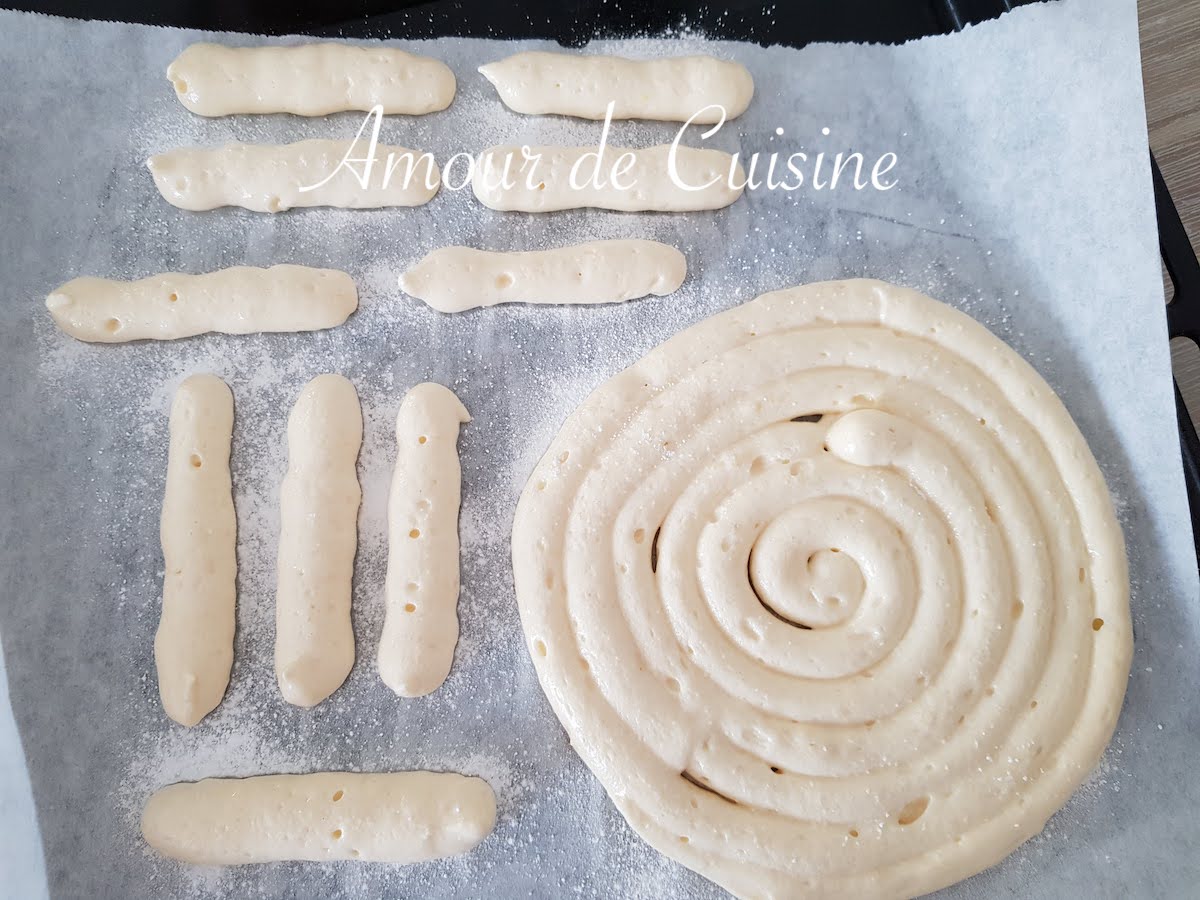
- Pipe the biscuits, Fill a piping bag (plain 1cm tip or just snip the end). Pipe even-sized biscuits onto a lined tray:
– 2 strips of 8×32 cm (for charlotte sides)
– 1 disc, 20cm diameter
– about 15 ladyfingers, 10cm each - Dust with powdered sugar, Dust generously with powdered sugar, let sit a few minutes, then dust again. This forms the classic crisp crust.
- Bake, Bake 10-15 minutes. Halfway, open the oven door briefly to release steam, then close immediately. This keeps them puffy and prevents collapse.
- Cool before removing, Let the biscuits cool slightly before gently removing from the tray, they’re delicate when warm.
Tip: Handle with care, they’re fragile straight from the oven!
Essential Tips for Perfect Homemade Ladyfingers
– Whip the egg whites to perfection: Use room-temperature eggs to help the whites whip up more easily. Beat until you get a glossy, soft meringue that forms a “bird’s beak” on the whisk, this is crucial for volume and a light, airy batter.
– Fold ingredients in gently: When adding the yolks and then the sifted flour, fold gently with a spatula. Always lift the batter from the bottom up, never stirring or beating, to avoid deflating the meringue. Over-mixing will make the batter runny, causing your ladyfingers to spread or collapse during baking.
– Avoid humidity in the kitchen: Humidity is the enemy of perfect ladyfingers! Excess moisture can make the powdered sugar dissolve or absorb moisture, preventing that signature crisp crust from forming. Like macarons, these biscuits are best made in a dry room, avoid baking on damp or rainy days.
– Manage steam during baking: For a crisp surface and the best rise, open the oven door briefly 4-5 minutes after baking begins to let out steam, then close it right away to keep the oven hot. This helps the ladyfingers stay tall and soft inside.
– Don’t skip the double dusting: Dust with powdered sugar once, let rest a few minutes, then dust again before baking. This double dusting gives you that classic, thin white crust on top.
– Bonus tip, handle when just warm: Wait a few minutes after baking before removing the ladyfingers from the tray. They’ll be less fragile and less likely to break.
With these tips, your homemade ladyfingers will always be light, fluffy, and topped with a beautiful, crackly crust!
How to Store & Freeze Homemade Ladyfingers
– At room temperature:
Store your ladyfingers in an airtight container, metal or food-safe plastic works best, to keep them fresh and prevent them from going soft.
Place a sheet of parchment paper or paper towel between layers to keep them from sticking together.
Protected from moisture this way, they’ll stay light and crisp for 2 to 3 days.
– Freezing:
For longer storage, wrap your cooled ladyfingers tightly in plastic wrap, then place them in a freezer bag or airtight box.
They freeze beautifully for up to 1-2 months.
To enjoy, just let them thaw at room temperature for 15 to 20 minutes.
Their texture and flavor will be just as good, perfect for making a spur-of-the-moment tiramisu or charlotte!
Tip: Avoid storing ladyfingers in the fridge, as humidity can make them lose their delicate crispness.
Ladyfingers FAQ: Your Top Questions Answered
– What’s the difference between “ladyfingers,” “boudoirs,” and “biscuits à la cuillère”? All these names refer to the same base recipe, but the main difference is texture and drying method. Store-bought boudoirs are often drier, perfect for soaking up coffee in tiramisu without falling apart. Homemade ladyfingers are usually softer and lighter, making them ideal for lining a charlotte mold since they fit the shape perfectly.
– Why dust with powdered sugar before baking? Powdered sugar creates a delicate, crisp white crust on the surface, which is characteristic of a well-made ladyfinger. It also helps the biscuits hold their shape as they bake, giving you sturdy yet airy layers for your desserts.
– Should I use convection (fan) or conventional heat to bake ladyfingers? Convection (fan) baking is recommended for even cooking and a beautiful rise. Keep an eye on the color, 180°C (350°F) is ideal, but adjust as needed for your oven. With conventional heat, watch closely so the edges don’t brown too quickly.
– Can I spread the batter in a tray for a charlotte? Absolutely! This is actually the simplest way to make the base and sides for a charlotte without piping strips. Just pipe or spread the batter in a spiral or rectangle, then cut to fit your pan after baking.
– Why did my ladyfingers spread out or collapse? If your ladyfingers lose their shape, it’s often because the egg whites weren’t whipped enough, the batter was overmixed when folding in the flour, or the kitchen was too humid. Follow each step gently and work in a dry environment to achieve puffy, airy biscuits every time.
Other Pastry recipes to try
- Swiss Meringue Buttercream recipe
- Sugared Cranberries : Frosted Cranberry “Jewels”
- Light French Sponge Cake : genoise
Best Homemade Ladyfingers Recipe
- Total Time: 30 minutes
- Yield: 50 ladyfingers 1x
Description
Soft, light, and easy to make, these homemade ladyfingers are a game changer for charlottes and tiramisus. With this simple recipe, foolproof tips, and just-right quantities, you’ll create desserts like a pastry chef.
Ingredients
- 4–5 Fresh eggs (about 160g whites + 90g yolks)
120 g Granulated sugar
120 g All-purpose flour
Pinch of salt
Powdered sugar (for dusting)
Instructions
-
Preheat the oven : Set to 180°C (350°F), fan-assisted, for even baking.
-
Whip the egg whites : In a clean bowl, beat the egg whites until frothy, then gradually add the granulated sugar. Continue whipping until you have glossy, soft peaks (the “bird’s beak” stage).
-
Loosen the yolks : Briefly whisk the egg yolks with a fork, just enough to liquefy.
-
Gently fold in the yolks : Using a spatula, carefully incorporate the yolks into the whites, keeping as much air as possible.
-
Fold in the sifted flour : Sift flour over the mixture and gently fold it in with a spatula, working from bottom to top until smooth and airy.
-
Pipe the biscuits : Fill a piping bag (plain 1cm tip or just snip the end). Pipe even-sized biscuits onto a lined tray:
– 2 strips of 8×32 cm (for charlotte sides)
– 1 disc, 20cm diameter
– about 15 ladyfingers, 10cm each -
Dust with powdered sugar : Dust generously with powdered sugar, let sit a few minutes, then dust again. This forms the classic crisp crust.
-
Bake : Bake 10-15 minutes. Halfway, open the oven door briefly to release steam, then close immediately. This keeps them puffy and prevents collapse.
-
Cool before removing : Let the biscuits cool slightly before gently removing from the tray, they’re delicate when warm.
- Prep Time: 15 min
- Cook Time: 15 min
- Category: Dessert
- Cuisine: italian cuisine
Nutrition
- Serving Size: 1 ladyfinger
- Calories: 27 kcal